The Card Class
See the full Java Card Class by clicking the button below.
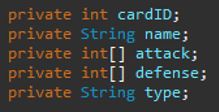
Java Card ClassThe Java Card class has five private variables defining the various required attributes which are accessible through public getters and setters along with two custom toString methods for outputting to the console.
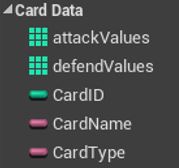
The matching Blueprint class stores those variables as Card Data.
The following components are needed for the graphics.
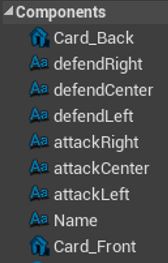
Card_Back and Card_Front are the Static Meshes which make up a single card. The text render values make up the visible card data which can only be seen when the card is face up. Those values are dynamically created for each card at runtime from a data table. More on the data table later.
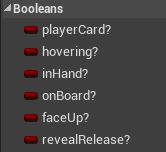
Booleans were created to assist in a state machine and other external functions.
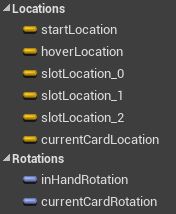
Location and Rotation variables needed for flipping and moving the cards.
Card Class Functions
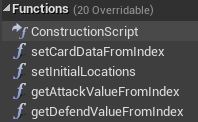
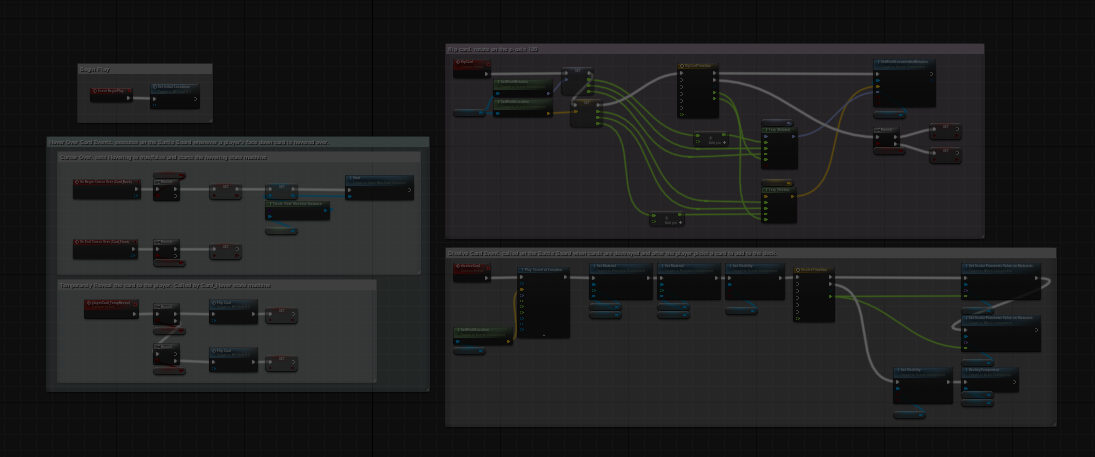
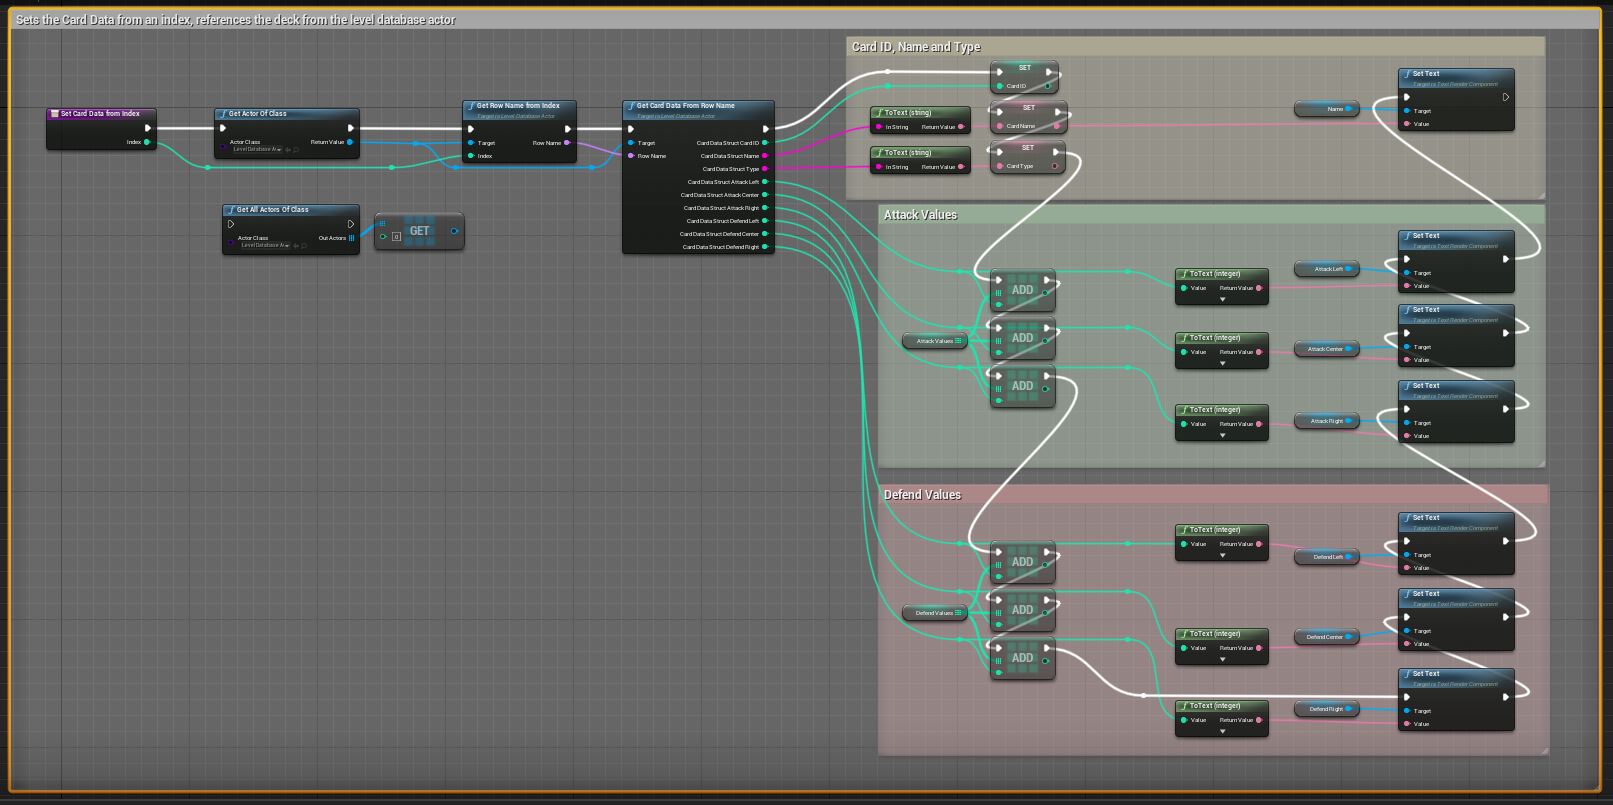
Set Card Data From Index
Hover over image to enlarge.
As it is named, given an integer index, set the Card Data variables. It also sets the text render components. The main reason I made the text render components over a single texture was to keep them data driven. Should I decide to make modifiers for the values, they can be changed the on the fly. The integer index refers to the location inside the data table. Notice there is an unused node, Get All Actors of Class and it’s Get companion. Starting this project, I almost exclusively used the Get All node until I noticed a Get Actor, singular option. This is a much faster way of getting a reference and it automatically makes it a reference over a copy, which is usually the desired effect.
Set Initial Location
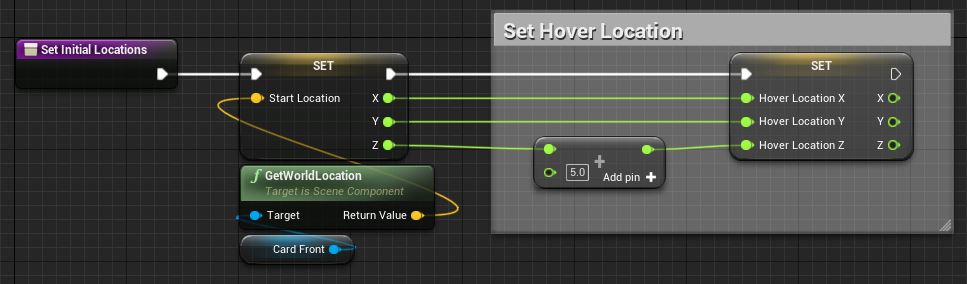
Function which is designed to be run when the card is created, sets the start and hover locations. This was originally going to set all the location variables, but as time went on, I realized that only some cards instances would need every location variable, so I whittled down this function to just the start and hover variables.
Get Attack/Defend Value From Index
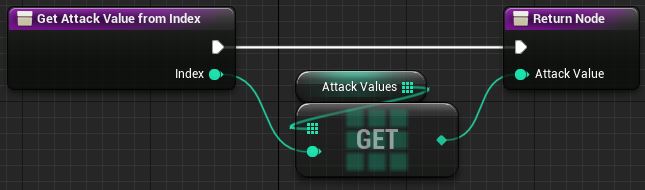
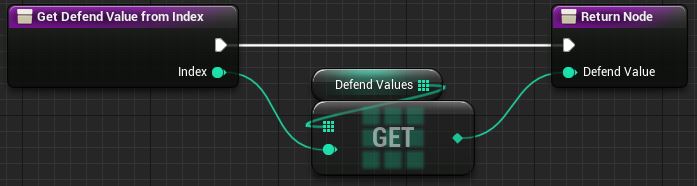
Each card has six attack and defend values, three for each, stored inside arrays. This function takes an integer index to indicate left, center, and right, then returns the corresponding value.
Custom Events
Hover Events
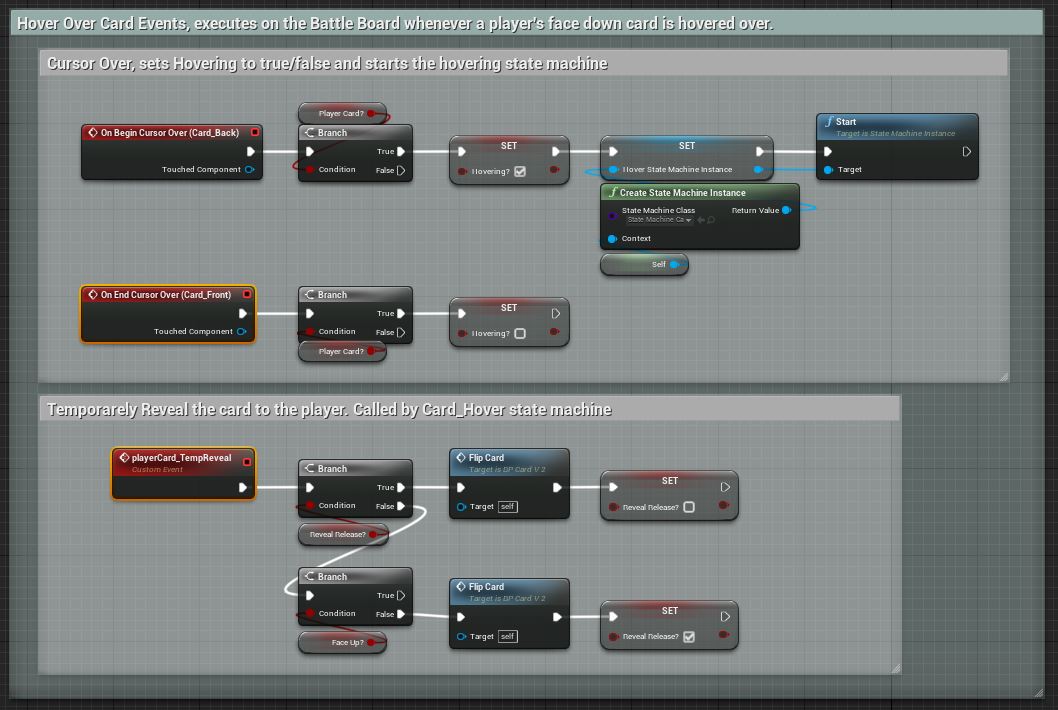
On Begin Cursor Over (Card_Back), On End Cursor Over (Card_Front), and playerCard_TempReveal work in conjunction with a state machine to reveal the front face of a player's card when it is face down. This could also have been accomplished by hooking the PlayerCard? Branch directly to the Temp Reveal event. However, during testing, the state machine outperformed the direct hookup. When I say outperformed, I mean that if you quickly swiped the mouse across the screen, the state machine handled the hovering update more effectively. Using the direct hook up, a quick swipe could leave the card or cards face up.
Flip Card Event
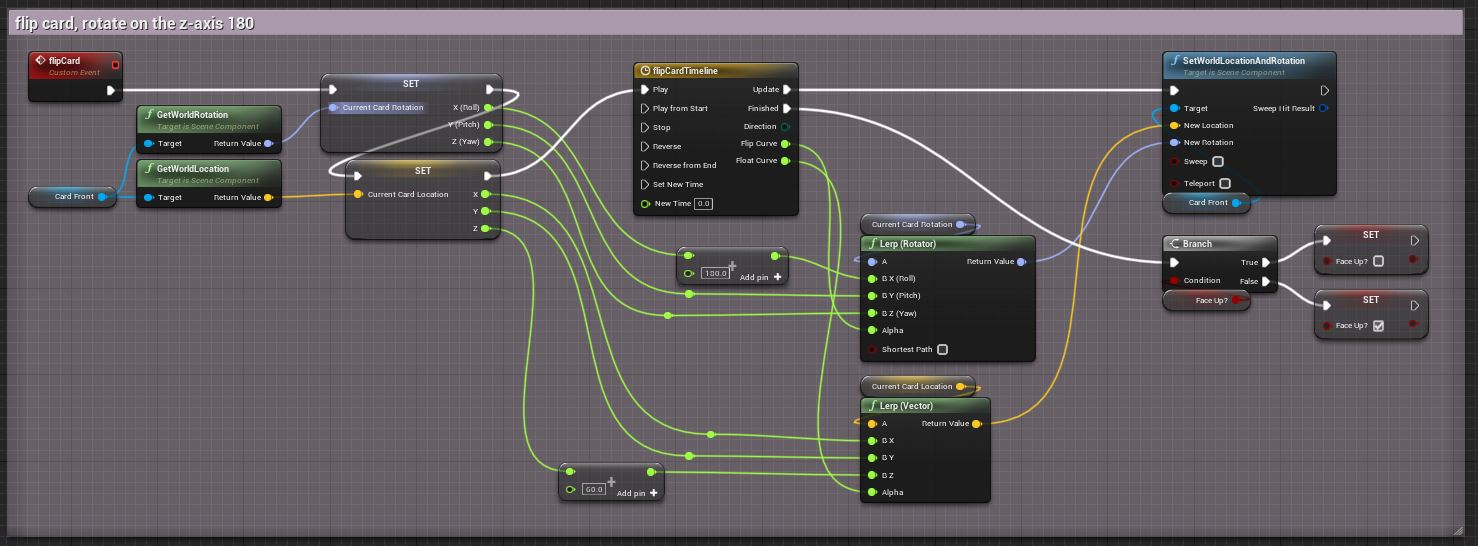
Hover over image to enlarge.
The Flip Card event calls on a timeline to lift the card up and flip it over. It also sets the faceUp? Boolean to match it's current state. The event can be called on a face down or face up card.
Dissolve Card Event
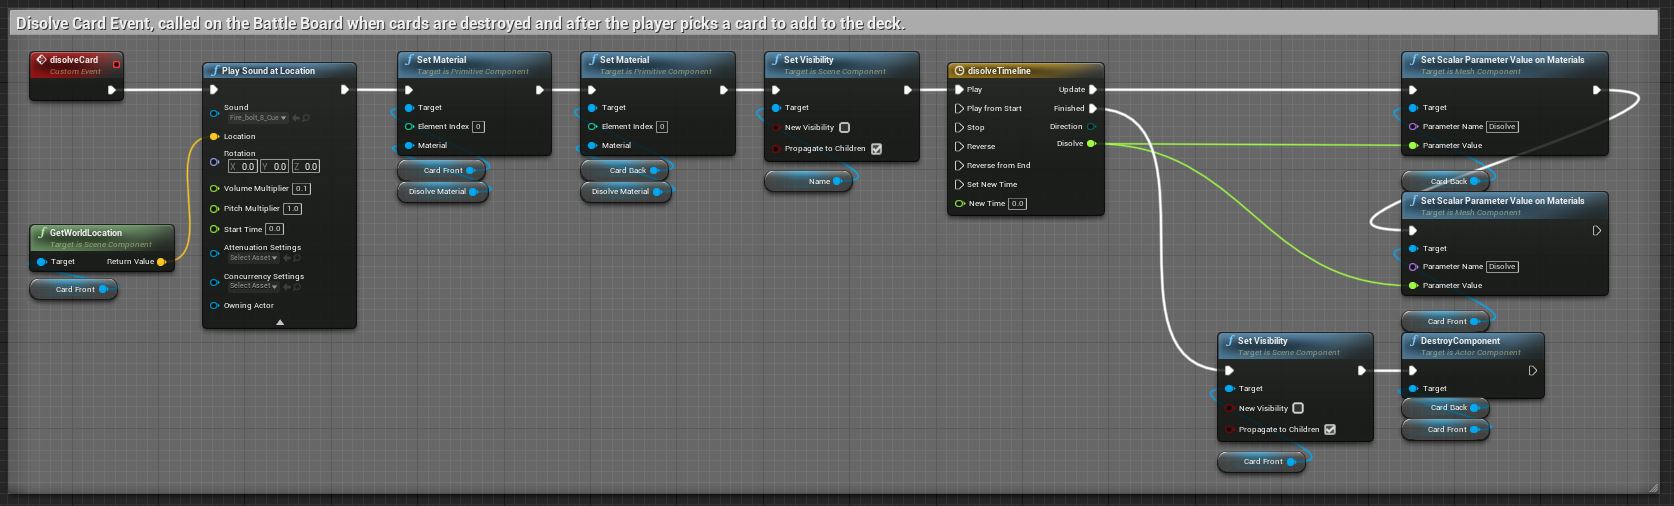
Hover over image to enlarge.
The Dissolve Card event is called when a card gets destroyed. A sizzle sound is played and the material is changed to a dynamic dissolve material instance. A timeline is used to change the dissolve variables set inside the material. After it's completion, the card is destroyed.
The base Dissolve Material was instanced from Material Mix by SoerGame. The sizzle sound is from Ultimate SFX Bundle by Sidearm Studios.
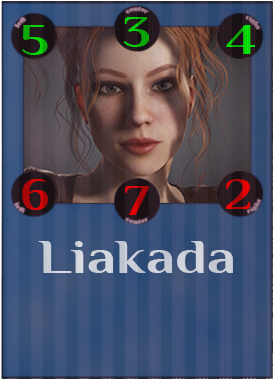
The Card Design
The current card design was made in Substance Painter and Blender. It is not, however, the final design. Once it is finalized, I will include a section on its creation.
Next Class: Card Slot
Card Slot →